Coffee Can Aluminum Smelter
A little over a year ago I revisited a smelting hack that I saw online sometime in the past. The first time I built this neat smelter, I had a bit of fun, but no pictures. This second time around I snapped a few (at the bottom of the post).
This little device gets hot enough to melt aluminum (~1200°F). Working with anything that hot is dangerous. Please be careful. I have melted not only my aluminum, but also my soup cans. The smelter works on the principle that soup cans have a higher melting point than aluminum. Unfortunately, many soup cans are made of an aluminum or tin alloy, so the melting temperature is no that much higher. Just make sure your crucible’s melting temperature is higher than ~1500°F (and that’s cutting it close).
Materials
- Safety glasses; leather gloves
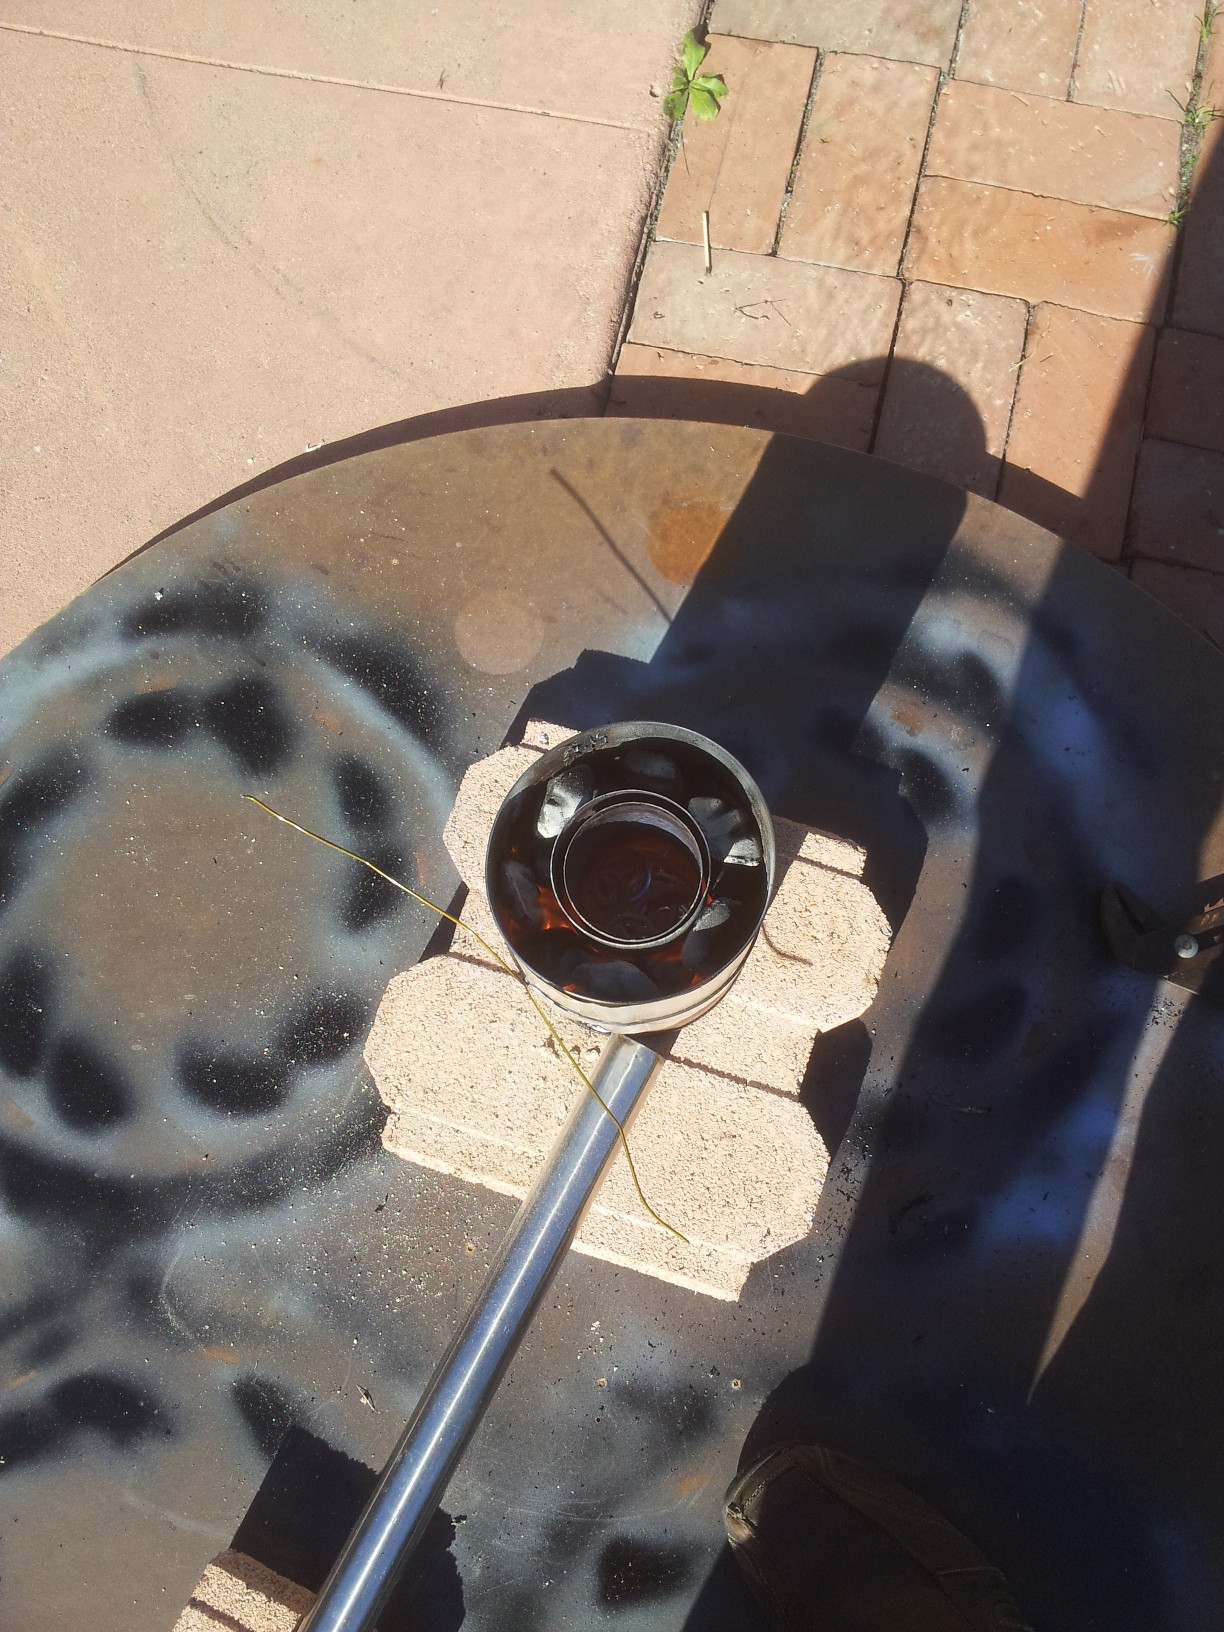
- 1 coffee can (#10 can)
- 1 soup can (large)
- 1 soup can (smaller)
- ~20-30 pieces of charcoal
- Lighter fluid and lighter/match
- ~2” metal tube/pipe (big enough to fit a hair dryer); 1-2 feet long
- 1 hair dryer
- Vice grips or pliers
Build
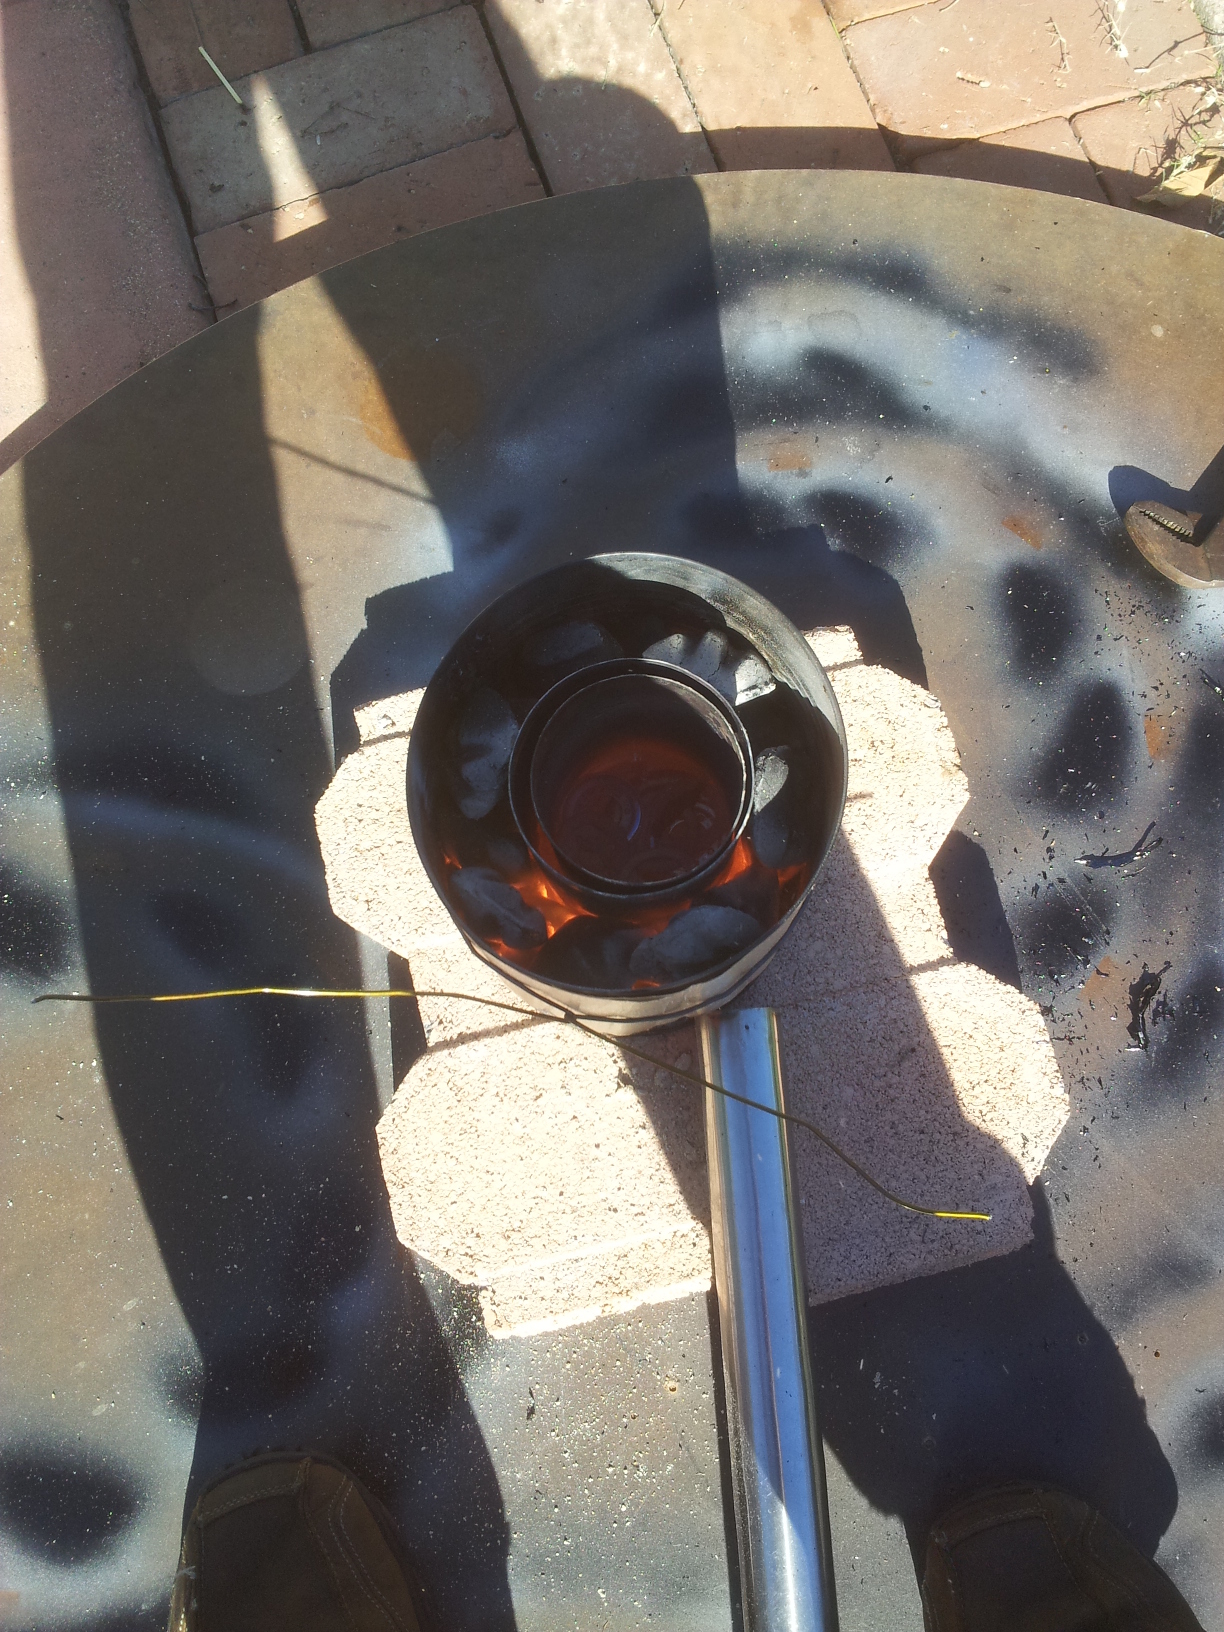
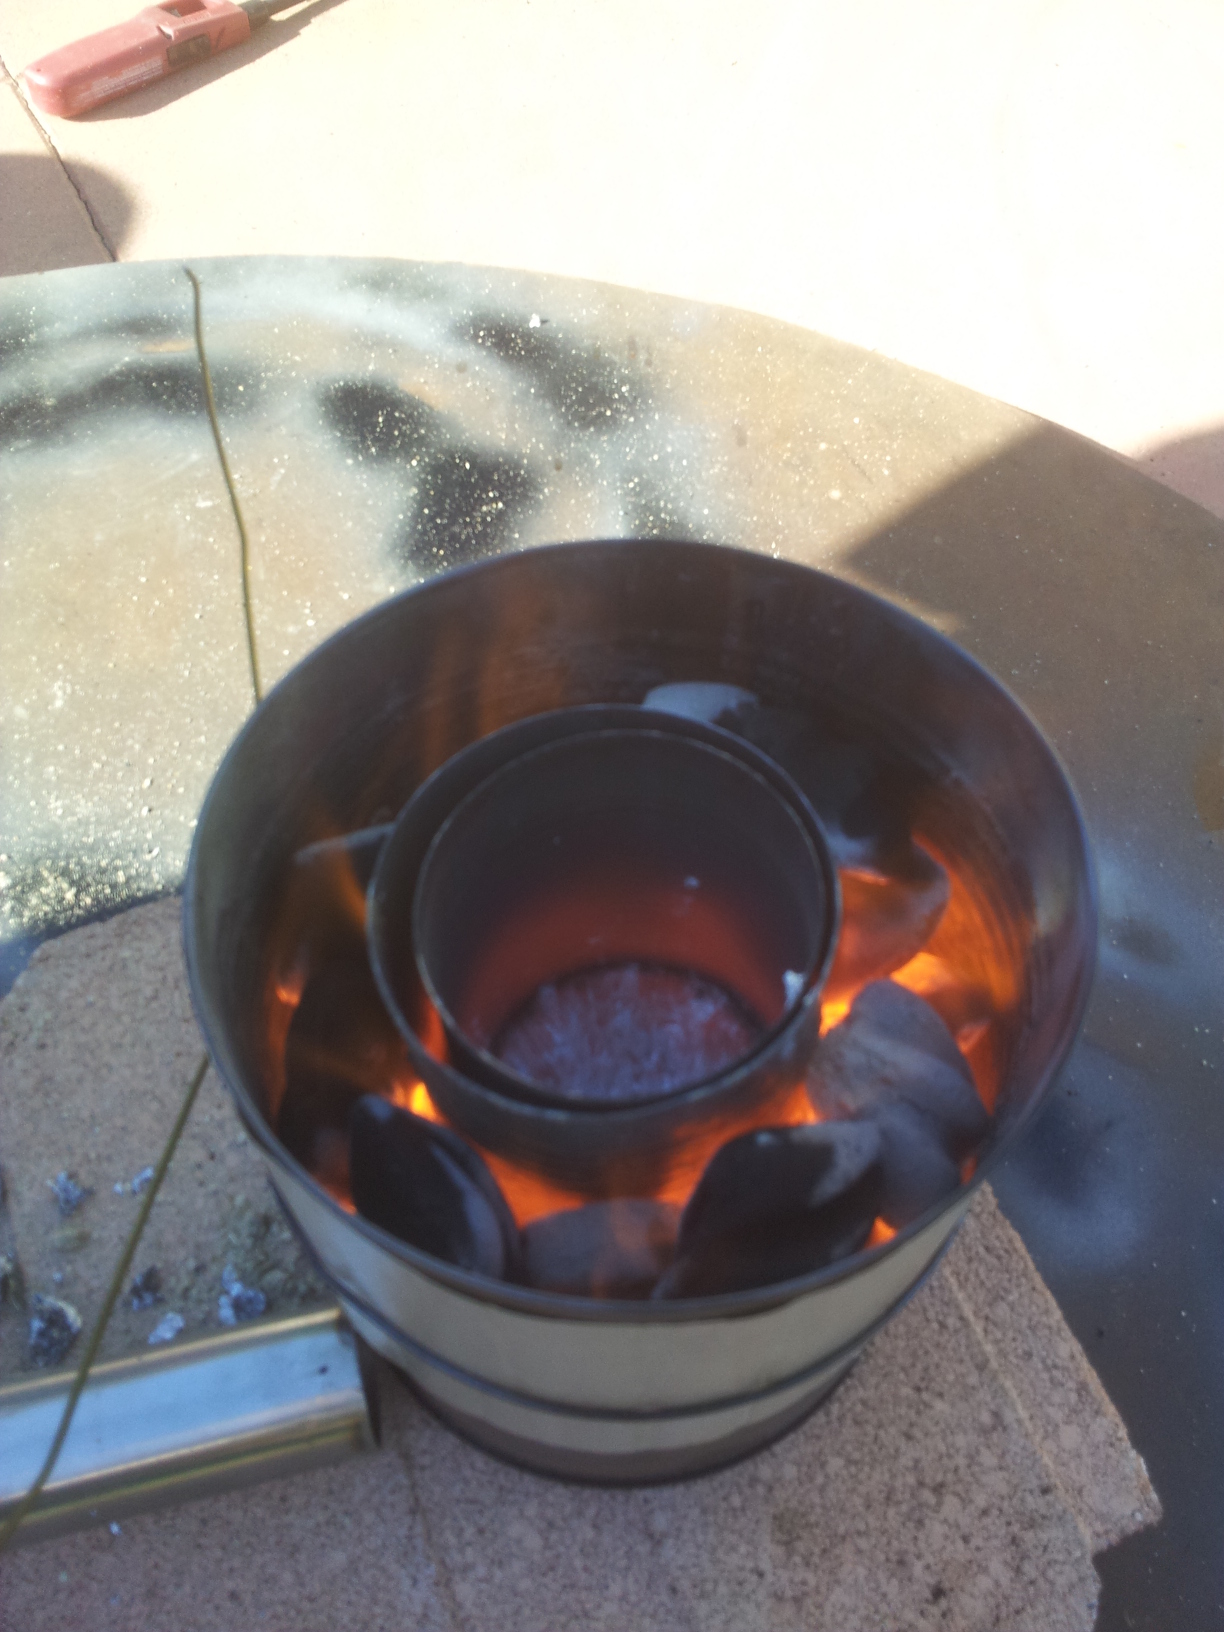
The build is straightforward. Take the #10 can and cut a hole in the side at the base, just big enough to fit your metal pipe/tube into. Put a layer or two of charcoal on the bottom of the #10 can and place the larger soup can in the center. Stack charcoal around the soup can up to the top. The smaller soup can serves as the actual crucible. It should fit inside of the larger can.
The hair dryer serves as a bellows. Tape (or somehow connect) the hair dryer to the metal pipe. Set both the pipe and the hair dryer aside as you light the smelter. You don’t want lighter fluid to enter the pipe and flow into the hair dryer.
Fill your crucible (the smaller soup can) with the aluminum you want to melt. I tend to use old computer hardware. A hard drive has plenty of aluminum (the platters generally have an aluminum substrate too).
To light the smelter, just pretend that you are lighting a barbecue. That is, pour copious amounts of lighter fluid on the charcoal and enjoy the mini-explosion! Let the coals become self-sustaining and then attach your bellows. You might not need to have a perfect alignment of the tube and the cutout. It is very easy to overheat the smelter. This is where the fun comes in, experiment and find out what works best!
Once your metal is melted, remove the crucible from the smelter. Be careful, the soup can might have holes in it. If that’s the case, just leave it in the forge and turn off the bellows. Let everything cool down, or risk making a mess.
Results
I don’t have a picture of my aluminum ingot, but rest assured, it works! The most lasting result from my first experiment is that my parent’s patio has a little crater in the cement. I poured the aluminum into a small metal cup that I had placed on the ground. As sound as I stood up and turned around, I heard a loud pop as I was pelted with cement. The beauty of thermal expansion!
I would really like to get some quantitative data on this little guy. Unfortunately, I don’t live in a place where I can do things like this anymore. If you own an infrared thermometer and you do this project, please let me know your results. I know I’ve achieved at least 1220°F, but since I don’t know the exact composition of the soup can that I melted, I don’t know any other limit. There is other data to gather to, such as the relationship between air flow and temperature, how long the charcoal is effective, etc.
In the photos below you might notice something wrapped around the #10 can and secured with a wire. That is some type of thermal paper. My dad took it out of a heat gun and thought it might be good to use on this project. The first time I built a smelter like this I did not use such an insulator and I did not melt my crucible. The second time I did (on both counts). It might just be coincidence, though.
Enjoy and be safe!